Custom implementation
For complete control over the challenge flow, you can build your own challenge flow using the Rupt API directly.
This feature operates under the Zero Trust security model. None of the information about the user is determined by the client.
How to use Rupt for fake account protection
Fake account protection flow
Browser side
- Install the Rupt Browser SDK:
yarn add rupt
#OR
npm install rupt
- Include the Rupt Browser SDK on the authentication page:
import Rupt from "rupt";
Or include the Rupt Browser SDK from a CDN:
<script src="https://cdn.rupt.dev/js/rupt.js"></script>
When using HTML script tags, be sure to wait for the script to be loaded. Rupt will be injected into the window so you can use window.Rupt instead of Rupt.
- Call the
getHashmethod from the browser SDK:
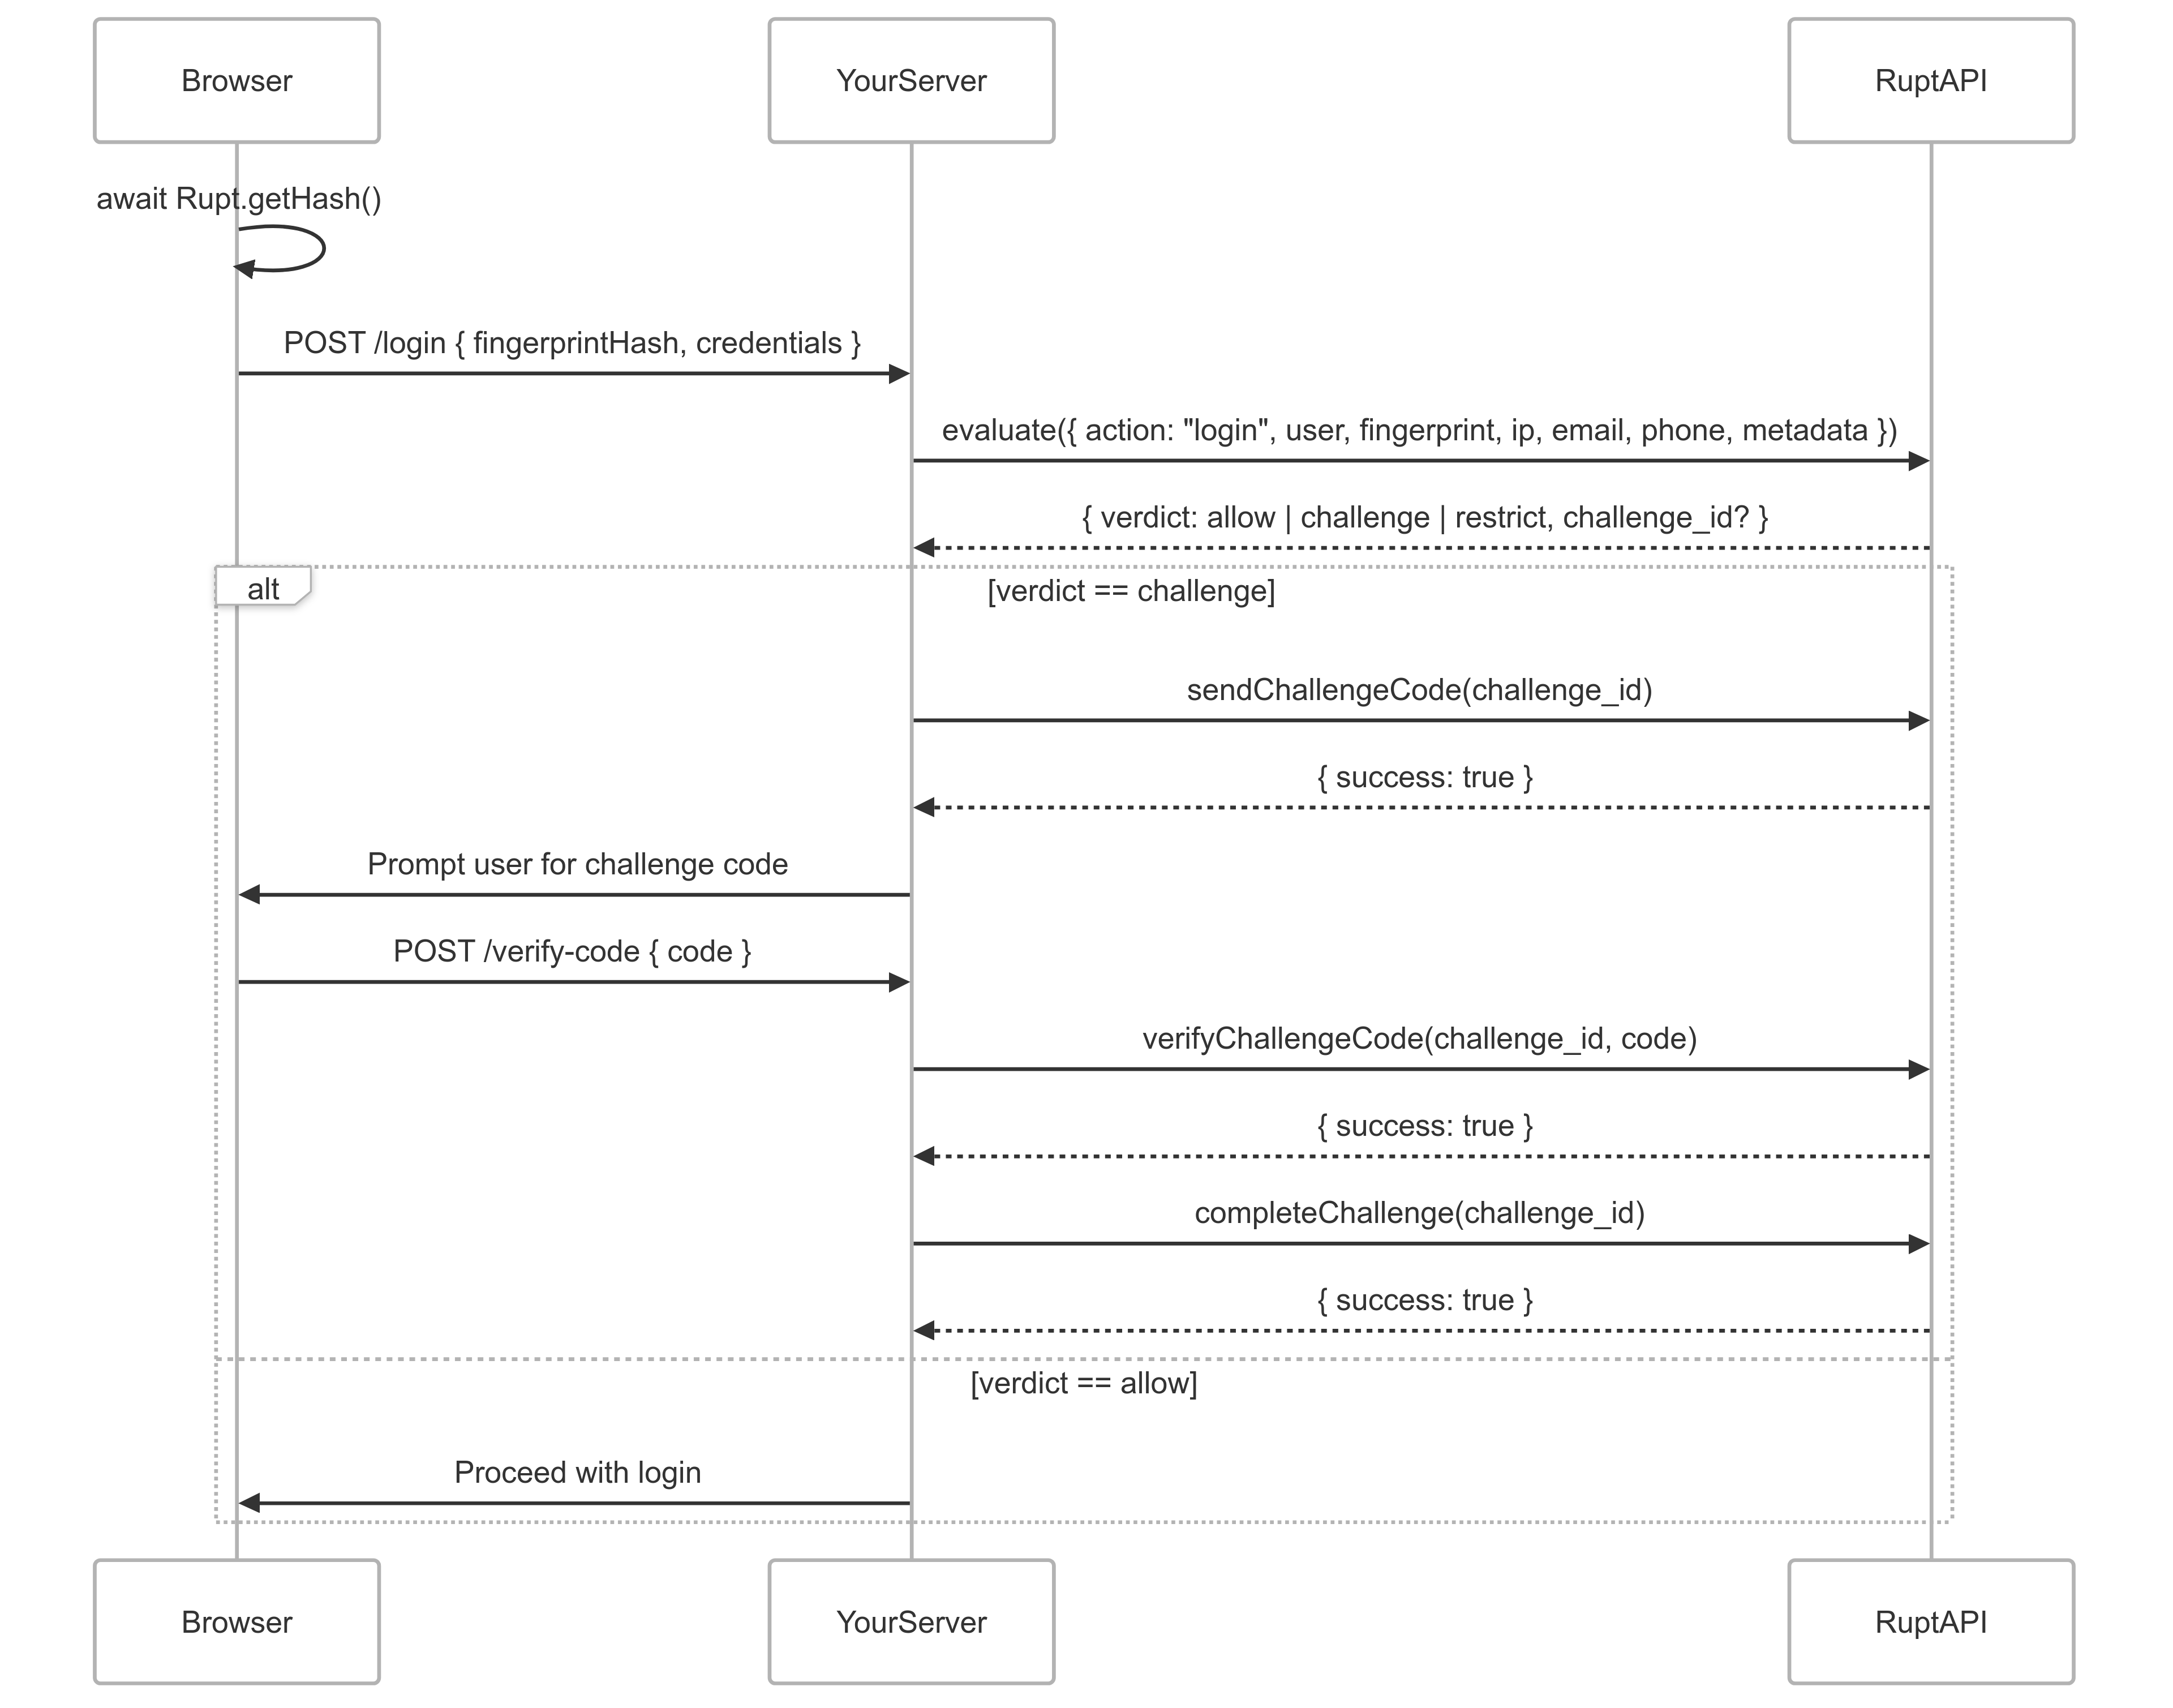
const [fingerprint, lastFingerprint] = await Rupt.getHash();
This returns a fingerprint hash array containing the current fingerprint and the last saved fingerprint. These should be sent to the server side separately in your authentication flow. For more information, see retrieve a device hash.
Server side
- Include the Rupt Node SDK:
yarn add @ruptjs/core
#OR
npm install @ruptjs/core
- Initialize the Rupt Node SDK with your project API secret:
import Rupt from "@ruptjs/core";
const rupt = new Rupt("API_SECRET");
3.1. Call the evaluate method using the signup action and the fingerprint hash and other user information in your authentication flow:
const res = await rupt.evaluate({
  action: "signup",
  user: "USER_ID",
  fingerprint: REQUEST_FINGERPRINT,
  last_fingerprint: REQUEST_LAST_FINGERPRINT,
  version: "2.32.0",
  ip: "IP_ADDRESS",
  email: "EMAIL",
  phone: "PHONE",
  metadata: {
    key: "value",
  },
});
curl -X POST https://api.rupt.com/v2/devices/evaluate \
  -H "Authorization: Bearer API_SECRET" \
  -H "Content-Type: application/json" \
  -d '{"action": "signup", "user": "USER_ID", "fingerprint": "REQUEST_FINGERPRINT", "last_fingerprint": "REQUEST_LAST_FINGERPRINT", "version": "2.32.0", "ip": "IP_ADDRESS", "email": "EMAIL", "phone": "PHONE", "metadata": {"key": "value"}}'
4.2. Rupt returns a response that looks like this:
{
  "verdict": "challenge",
  "fingerprint_id": "xxxxxxxx-xxxx-xxxx-xxxx-xxxxxxxxxxxx",
  "reasons": ["new_device", "new_ip"],
  "challenge_id": "xxxxxxxx-xxxx-xxxx-xxxx-xxxxxxxxxxxx",
}
The verdict will be either challenge, allow, restrict, challenge_and_restrict, or deny. The challenge_id can be used to perform a two-factor authentication challenge using the send challenge code method. For more information, see send a challenge code.
5.3. If the verdict is challenge, a challenge_id is returned. Using the challenge_id, send the challenge code to the user and wait for the response:
const { challenge_id } = await rupt.sendChallengeCode(challenge_id);
curl -X POST https://api.rupt.com/v2/challenges/CHALLENGE_ID/send \
  -H "Authorization: Bearer API_SECRET" \
  -H "Content-Type: application/json"
This will send a challenge code to the user. For more information, see send a challenge code.
6.4. With the user provided challenge code, verify the response:
const { success } = await rupt.verifyChallengeCode(challenge_id, code);
curl -X POST https://api.rupt.com/v2/challenges/CHALLENGE_ID/verify \
  -H "Authorization: Bearer API_SECRET" \
  -H "Content-Type: application/json" \
  -d '{"code": "123456"}'
For more information, see verify a challenge code.
7.5. Complete the challenge following verification. This will ensure that the user will not be asked to verify the challenge code again for the same reasons. You can use the completeChallenge method:
const { success } = await rupt.completeChallenge(challenge_id);
curl -X POST https://api.rupt.com/v2/challenges/CHALLENGE_ID/complete \
  -H "Authorization: Bearer API_SECRET" \
  -H "Content-Type: application/json"
For more information, see complete a challenge.